In this tutorial, we will be looking at how we can implement a basic Stripe subscription in a nodejs application.
Stripe, as most of us, are already aware it is a popular payment processing service for e-commerce websites and applications, and today we will be utilizing it to build a basic app that will allow us to accept subscription payments from our users.
Set up Stripe Account
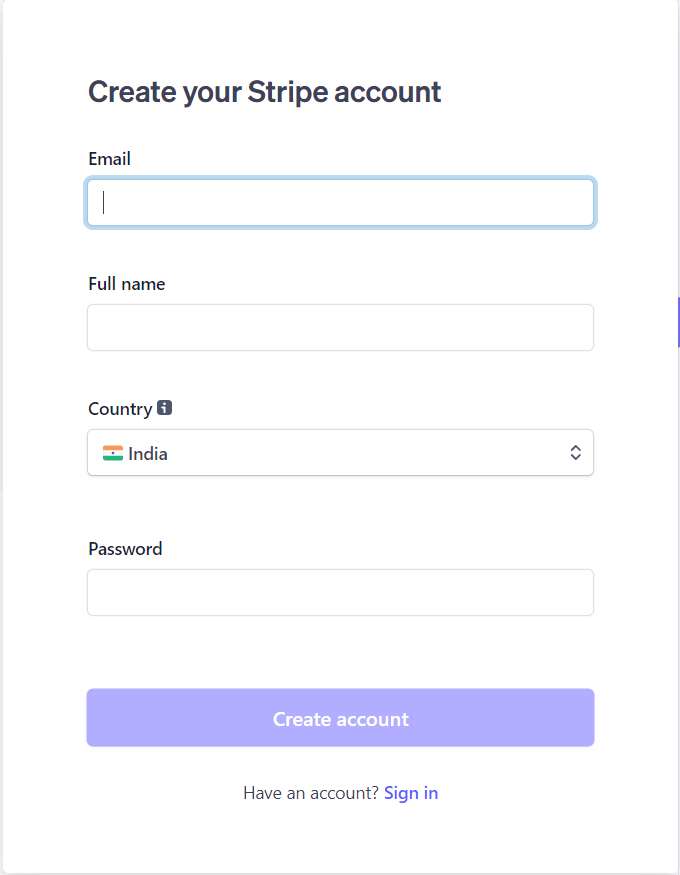
Before we even get started with implementing our Stripe subscription application in nodejs we need to first have an account with stripe. To create one just visit stripe and fill the form with your required details.
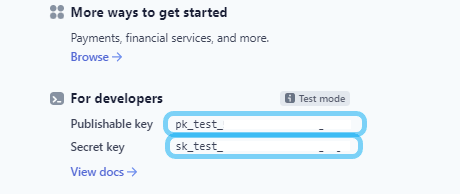
Once we are done with the above, let’s navigate to the dashboard section and copy+save the test secret key from the for developers section. This secret key is like your password and one who has it can control transactions on your behalf.
Now stripe has the concept of products that allow us to add products directly from our dashboard without needing to maintain/build our own in our backend and thus greatly reduces complexity.
So you may be wondering how is that even useful for our project? Well, what we can do is that consider each plan of our subscription as a product and add it to stripe, and let stripe’s checkout manage it for us.
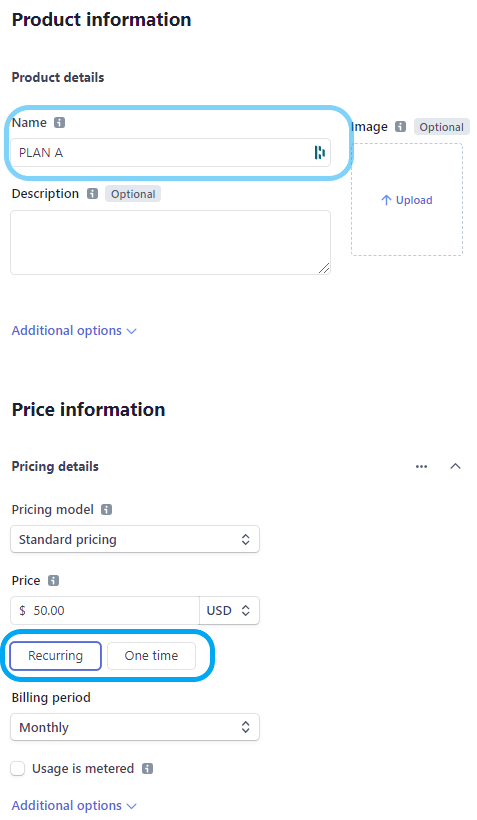
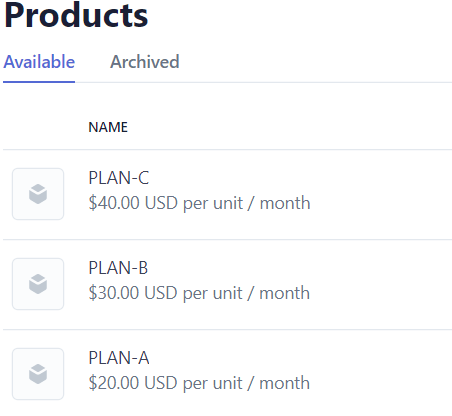
So let’s head over to the Products tab in the dashboard and start adding products/subscriptions. Now for the sake of this tutorial, we will be providing the user to select from 3 plans namely PlanA, PlanB, and PlanC.
When adding a plan make sure to choose the Recurring option with monthly as our billing period and keep Usage is metered unchecked while adding the product we only want to charge users on monthly basis and not on a usage basis.
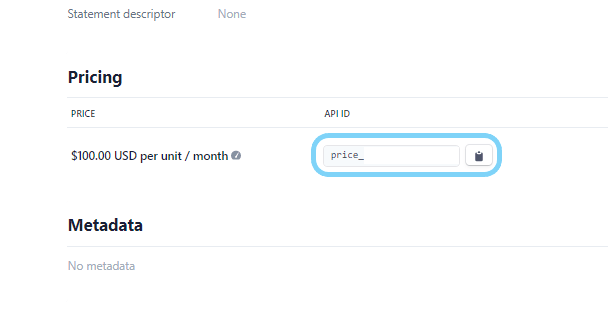
When creating a product strip will provide us with a product API ID using which we can use to refer to a particular subscription plan in our nodejs app. Make sure you copy and save all the APP IDs as we will require them later on.
Initialization of our stripe subscription nodejs application
Once we have completed setting up our Stripe account, let’s start with the backend of our nodejs application.
First of all, let’s initialize our nodejs project and install some of the required dependencies.
npm init -ynpm install express dotenv stripeThen, we need to set up our .env file where we have our environment variables.
STRIPE_SECRET_KEY=YOUR_STRIPE_SECRET_KEYNow that, we are ready with the required details let’s jump into the coding part.
Create a stripe session for our stripe subscription
Before moving forward, let’s first understand what is a Stripe session?
A stripe session represents the customer’s session as they pay for one-time purchases or subscriptions through Checkout or Payment Links.
With that information let’s see how we can create a stripe session URL.
To create a session URL, we have defined an asynchronous function namely stripeSession which takes in a planId(product API ID) as an argument and returns a payment session that will be responsible for making a payment according to the user’s chosen planId. Once a payment gets succeeded it will redirect the user to the success.html page or else to the cancel.html page.
const stripeSession = async (planId) => {
  try {
    const session = await stripe.checkout.sessions.create({
      mode: "subscription",
      payment_method_types: ["card"],
      line_items: [
        {
          price: plan,
        },
      ],
      success_url: "http://localhost:3000/success.html",
      cancel_url: "http://localhost:3000/cancel.html",
    });
    return session;
  } catch (e) {
    return e;
  }
};
Handle ROUTES
Next, let’s create all the required routes.
GET-“/” – Here we will be rendering our index.html which is our demo subscription page.
app.get("/", (req, res) => {
  res.render("index");
});
POST-“/checkout-session” – Here we will be calling our stripeSession with the corresponding planId selected by a user and return a session URL.
app.post("/checkout-session", async (req, res) => {
  const { plan } = req.body;
  let planId = null;
  if (plan == 20) planId = planA;
  else if (plan == 30) planId = planB;
  else if (plan == 40) planId = planC;
  try {
    const { url } = await stripeSession(planId);
    return res.json({ url });
  } catch (error) {
    res.send(error);
  }
});
After all the implementations our code should look something like below.
require("dotenv").config();
const express = require("express");
const { json } = require("express");
const Stripe = require("stripe");
const app = express();
const stripe = Stripe(process.env.STRIPE_SECRET_KEY);
app.use(express.static("public"));
app.use(json());
const PORT = process.env.PORT || 3000;
const [planA, planB, planC] = [
  "price_PlanA",
  "price_PlanB",
  "price_PlanC",
];

const stripeSession = async (plan) => {
  try {
    const session = await stripe.checkout.sessions.create({
      mode: "subscription",
      payment_method_types: ["card"],
      line_items: [
        {
          price: plan,
        },
      ],
      success_url: "http://localhost:3000/success.html",
      cancel_url: "http://localhost:3000/cancel.html",
    });
    return session;
  } catch (e) {
    return e;
  }
};

app.get("/", (req, res) => {
  res.render("index");
});

app.post("/checkout-session", async (req, res) => {
  const { plan } = req.body;
  let planId = null;
  if (plan == 20) planId = planA;
  else if (plan == 30) planId = planB;
  else if (plan == 40) planId = planC;
  try {
    const { url } = await stripeSession(planId);
    return res.json({ url });
  } catch (error) {
    res.send(error);
  }
});

app.listen(PORT, () => console.log(`Server is up and running on ${PORT}`));
Create frontend for our stripe subscription
Now that we are all set with our backend part let’s create our UI.
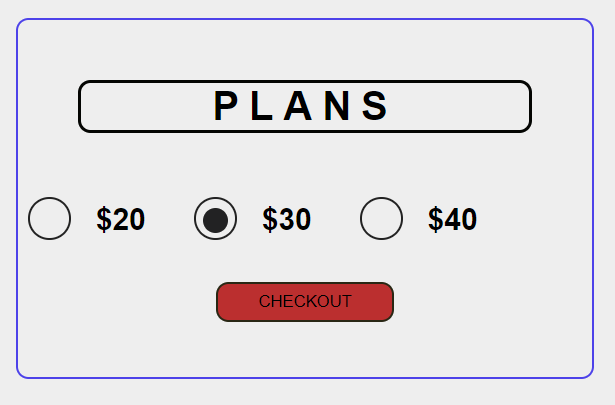
First of all, we have created an index.html file inside the public directory which is the subscription page for our application. Ui is pretty simple, we have a form that contains 3 radio buttons for each of our plans together with a checkout button at the bottom.
At the very top, we are including a styles.css file with our styles for the form which is not that important from a functional point of view. We also have a script.js included at the very bottom of our index.html file which will be responsible for all the frontend logic and is what we will be concentrating on below.
<!DOCTYPE html>
<html lang="en">
  <head>
    <meta charset="UTF-8" />
    <meta http-equiv="X-UA-Compatible" content="IE=edge" />
    <meta name="viewport" content="width=device-width, initial-scale=1.0" />
    <title>PLANS</title>
    <link rel="stylesheet" href="./css/style.css" />
  </head>
  <body>
    <div id="form-container">
      <h1 id="heading">PLANS</h1>
      <form>
        <input type="radio" name="plan" id="plan1" value="20" />
        <label for="plan1">$20</label>
        <input type="radio" name="plan" id="plan2" value="30" />
        <label for="plan2">$30</label>
        <input type="radio" name="plan" id="plan3" value="40" />
        <label for="plan3">$40</label>
        <input id="submit-button" type="submit" value="CHECKOUT" />
      </form>
    </div>
    <script src="./js/script.js"></script>
  </body>
</html>
After successful implementation, our UI will look something like this.
In the script.js file, we are grabbing the button using its id by document.getElementById and then attached a click event listener to it. Once the button is clicked, it will send a post request with our selected planId to our backend server which in turn will return us the stripe’s session URL to which we will redirect the user to complete the checkout process.
const button = document.getElementById("submit-button");
button.addEventListener("click", async (e) => {
  e.preventDefault();
  const response = await fetch("/checkout-session", {
    method: "POST",
    headers: {
      "Content-Type": "application/json",
    },
    body: JSON.stringify({ plan: plan() }),
  });
  const { url } = await response.json();
  window.location = url;
});
We have also included a function expression to handle the planId selection.
const plan = () => {
const plan1 = document.getElementById("plan1");
const plan2 = document.getElementById("plan2");
const plan3 = document.getElementById("plan3");
if (plan1.checked == true) {
return plan1.value;
} else if (plan2.checked == true) {
return plan2.value;
} else if (plan3.checked == true) {
return plan3.value;
} else {
return "Select any Plan..";
}
};
const button = document.getElementById("submit-button");
button.addEventListener("click", async (e) => {
e.preventDefault();
const response = await fetch("/checkout-session", {
method: "POST",
headers: {
"Content-Type": "application/json",
},
body: JSON.stringify({ plan: plan() }),
});
const { url } = await response.json();
window.location = url;
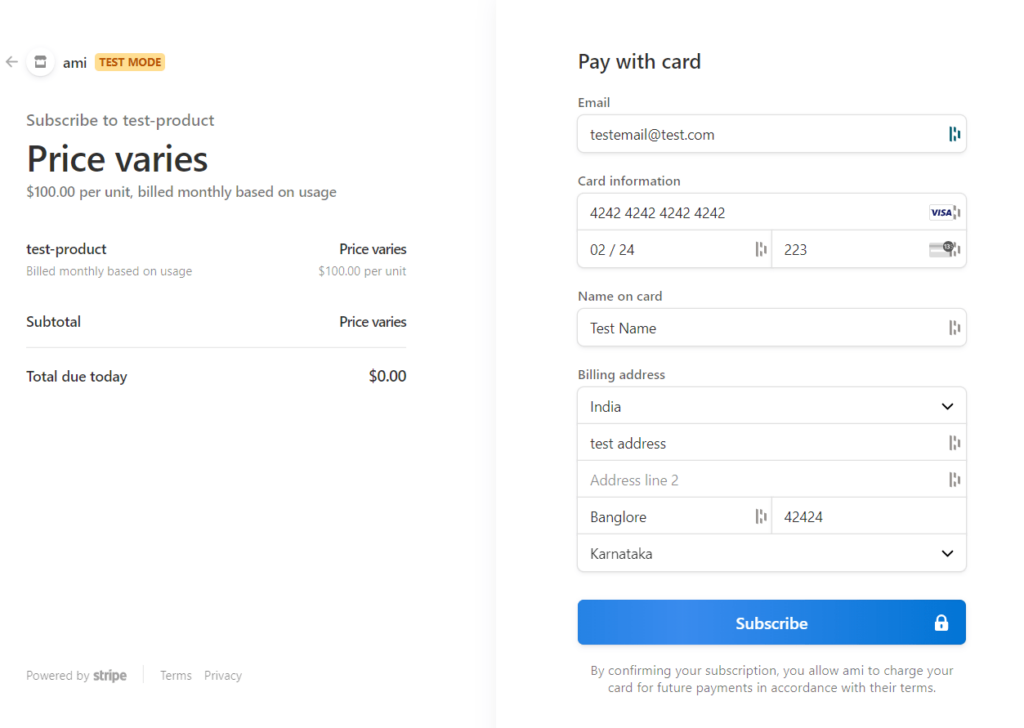
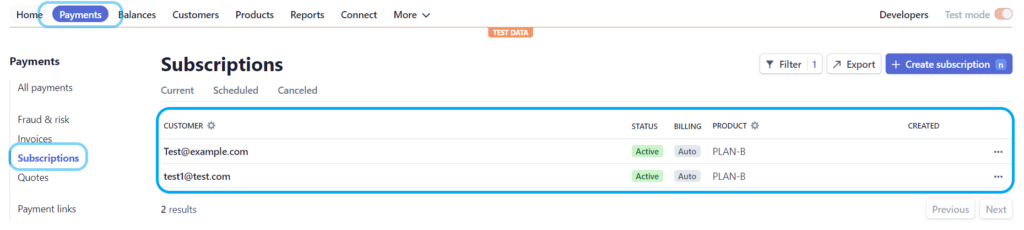
});With all that implementation we can now make a payment through Stripe.
For testing enter these dummy details.
- Email:- [email protected]
- Card Number :- 4242 4242 4242 4242
- Expiry Date :- Any future date
- CVV :- Any
- Name :- Any
- Billing Address :- Any dummy address
Conclusion
Walah! we have successfully a payment integration module for node applications. Hope you find it useful. If you liked this blog feel free to appreciate it in the comments. Also if there is any query don’t forget to ask in the comment section below.
THANK YOU!