Many a times especially in production environment we may require our app to be available to our users at all times or have the least possible minimum down-time no matter even if one or a few of our app servers are down or has crashed. As long as one instance of our app is running we want our app to be accessible to our users. So in this tutorial, we will be walking you through the process of achieving higher availability using a technology called Docker Swarm.
Agenda
- Setup Docker Swarm
- Deploy our app as a service using Docker swarm
- Scale up/down our service.
- Test availability of app.
Now to keep thing short and focused in our docker swarm tutorial we will not create a demo app from scratch but instead will use one of our previous app examples which happens to be an express.js app. But it can be anything you like as long as you can create or already have a docker image of your app.
Prerequisites
- Ubuntu servers
- Docker apt install docker.io -y
- Make sure you have the
2377/tcp 🠪 cluster management communications
7946/tcp & 7946/udp 🠪 communication among nodes
4789/udp 🠪 overlay network traffic
ports open on your system for docker swarm to operate.
Setup Docker Swarm
Before we move on to setting up a docker swarm let’s understand what a docker swarm is real quick. A Docker swarm is a cluster of one or more physical or virtual machines also known as nodes, running the Docker engine. In a swarm cluster, there are two types of node
- Manager node 🠪 mainly handles cluster management tasks like maintaining cluster state, scheduling services, serving swarm mode HTTP API endpoints, apart from also acting as a worker node itself.
- Worker node 🠪 executes a task(atomic scheduling unit of swarm) assigned by a manager node.
Initialize a swarm
We initialize a swarm by running the below command on a node.
docker swarm init --advertise-addr <ip address of the server or node>The node on which we run the init command becomes the manager node. Now you can think of the manager node as the captain while the worker nodes as players in a team. Therefore almost all swarm related command are executed on the manager node.
After we have initialized our swarm we need to begin adding more nodes to it to create a cluster. Now we can add a node to our swarm either as a manger or a worker.
To add a node as a worker run the below command in the manager node.
docker swarm join-token workerRunning the above command with provide us with the a command(token) which we needs to run on a node we want to join as worker.docker swarm join –token <TOKEN>
You can run the above command on to as many nodes as you want to add them as workers.
Although we already have one manager at this point but we can add additional nodes to our cluster as manager nodes. To to that it pretty much the same as adding a worker node. Run the below command in our existing manager node.
docker swarm join-token managerJust like we did for our worker node we need to run the same command with the token(from above command) to add a new node as a manager.docker swarm join –token <TOKEN>
To verify that we have successfully added the node to our cluster we can run the below command on a manager node.
docker node ls
Docker swarm service
Now that we have our cluster of nodes ready we can start with the process of deploying our app and take advantage of docker swarm. But you may ask how? It’s not like that we can directly start running container on each of the node separately. So how do we do it than? Well we can do it by creating what is know as a service.
You can think of a service like a blueprint of a task we want to execute in our swarm. With a service we define the desired state of our app in our cluster and docker swarm’s manager node work on to achieve that desired state.
create a docker swarm service(example)
Now that we also have a notion of what a docker service is, let’s deploy our app by creating our first service. For that let’s suppose we have 3 nodes in our cluster(1 manager & 2 workers) and we want 3 replicas of our app.
docker service create --name SwarmTesting --replicas 3 --publish 8080:3000 your_imageTo use the the above command we need have a docker image of our app.
In the above command we have used 3 flags, let’s understand them
- –name 🠪 name of our service. In this case it’s SwarmTesting
- –replicas 🠪 number of instances of our app we want running.
- –publish 🠪 port mapping host_port:container_port
Running the above command in our manager node will make the manager dispatch the task to our workers nodes. As in our desired state we want 3 replicas, one instances of our app will running in each of our nodes(1 task in manager node and 2 in the worker nodes).


To have a detailed view of our service, type in the below command in our manager node.
docker service ps SwarmTesting
We can also check if our app is running on each our node by logging into any node and run the below command.
docker ps
Playing with our docker swarm service
If we run the below command on a manager node we will get a list of all our running nodes in our cluster and their status.
docker node lsBy default a manager node also executes tasks like a worker node but we can also change that and instruct it to only perform the task of a manager and not execute a task itself. To do that we can do what is called draining a node.
Drain a node from our swarm cluster(example)
Let’s suppose for any reason one of our nodes is unavailable or has crashed. So in that case let’s see how our service’s availability will be affected? For the purposes of this docker swarm tutorial let’s intentionally drain one of our nodes(suppose Worker-1) using the command.
docker node update --availability drain Worker-1
Note: The above command will only work when run in a manager node
In a similar manage we can also drain our Manager node itself like below
docker node update --availability drain Manager
Draining the manage will also exclude it from task execution as have been told previously. So a question may pop up in your mind and that is, What will happen to our 3 instances of our app if our Manger node and another Worker-1 node have been drain? Will only 1 instance of our app be running now that we only have effectively 1 worker node(Worker-2) in our cluster?
The answer is simple our cluster will still be running 3 replicas of our app as it is our desired state. Now for that what will docker swarm do it spin up 2 additional instances of our app within the Worker-2 itself to reach our desired state of 3 replicas as you can see from below image.

As you can see our Worker-2 is running all the 3(desired state) replicas while the other 2 nodes have been drained and this is the exact behavior if any node in our cluster goes down for some reason or crash. Docker swarm ensures that eventually we achieve the desired state of our app and thus maintain higher availability.
Scale our swarm cluster(example)
Sometimes it may be required that your app can scale up or down easily to meet your user’s demands. With docker swarm this is very easy to achieve and is only a command away.
To demonstrated this let’s suppose that the demand for our app has reduced due to covid. Therefore to cut on cost we want to reduce the number of instances of our app to say 2 replicas. To do that we run the below command.
docker service scale SwarmTesting=2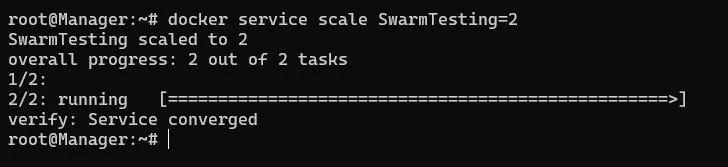

Therefore say if previously we had 3 servers running each running 1 instance of our app, now we can remove 1 server from our cluster as 2 servers are enough to run 2 replicas(1 each).
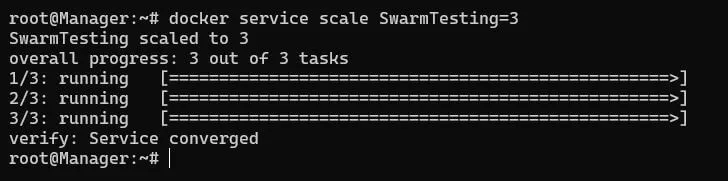
Similarly when demand for our app grows we can just as easily scale it up as we scaled it down. We just need to a few more nodes(as workers) to our cluster and scale it up appropriately. For now we will scale it up back gain to our initial 3 replicas.
Conclusion
With that we have reached the end of this short tutorial on docker swarm. Here as you guys have already guessed, we have just scratch the surface of what you can achieve with docker swarm being such a powerful tool it is. I hope you like this post and in case you have any doubts or questions please feel free to leave a comment down below otherwise show us your love by sharing it with your friends and on social media.