In this tutorial, we will be learning how to integrate Cloudinary image upload API in nodejs. If you remember, previously in one of our posts we discussed how we can upload a file in nodejs and if you haven’t checked it out yet you can do so here. Today our focus will be on a 3rd party API known as Cloudinary.
Now those who are new to Cloudinary, it’s a SaaS that provides services for storing, managing, manipulating images and videos.
With Cloudinary it becomes extremely easy to bake in image upload functionality to our nodejs app. Apart from image uploads it also has support for video uploads which we will not cover in this tutorial and will be limited to image upload only.
It is one of the best APIs we can use to manipulate images or even video on the go. Let’s not waste any more time and get started with the basics.
Set up a cloudinary account for our nodejs app
To follow along, we will need a Cloudinary account. If you don’t already have one you can create one by clicking here. Once our account is ready, we can navigate to our dashboard section which will look sometime like the below image.
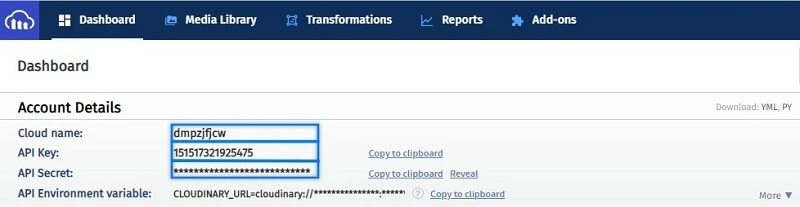
Because for our node.js app to communicate with the Cloudinary API, we will require the details below
- YOUR_USER_NAME
- API Key
- API Secret
which we will need to copy from our account’s dashboard to be used later in the tutorial.
Install cloudinary and other required nodejs packages
Before we start, we need to initialize our nodejs app using the command below.
npm init -yAfter that will also need to install some dependencies.
npm install cloudinary express multer dotenvnpm install --save-dev nodemonConfigure our nodejs app for cloudinary
Once we are finished with the installation phase, we can start configuring Cloudinary which is super easy by the way.
Firstly we want to make sure that our Cloudinary API settings are accessible from anywhere in our app via process.env.
To do so we will need to create a ‘.env‘ file in our project’s root directory and copy-paste the below contents in it.
CLOUDINARY_NAME=your_username
CLOUDINARY_API_KEY=your_api_key
CLOUDINARY_API_SECRET=your_api_secret
The dotenv package will automatically parse the Key=values inside the “.env” file and inject it inside the process.env object which we can access from any file in our code.
Secondly, we need to create a root file for our application and inside it, we will initialize Cloudinary by passing a config object as shown in the below code snippet.
require("dotenv").config();

const { v2: cloudinary } = require("cloudinary");

cloudinary.config({
  cloud_name: process.env.CLOUDINARY_NAME,
  api_key: process.env.CLOUDINARY_API_KEY,
  api_secret: process.env.CLOUDINARY_API_SECRET,
});
Spin up a basic nodejs api
Now that we are done with the basic configuration stuff we can spin up a basic express.js server.
const express = require("express");
const multer = require("multer");

const app = express();

const multerSingle = multer();

const port = process.env.PORT || 3000;

app.post("/upload", multerSingle.single("image"), async(req, res) => {
     //we can simply check the required file using console.log
     //it will return the required file into buffer.
     res.send("ok");
})

app.listen(port, () => {console.log("Server is up and running on PORT ", port)})
If we run “node app.js” you should have an express server running on our local system.
Stream file buffer to cloudinary api
Now that our express server is up and running we have come to the most important step of our tutorial which is to create a function named bufferUpload. This function will take in a file buffer as input and upload that to Cloudinary.
Here is an overview of how it works.
- Firstly, we create a writestream using upload_stream method provided by cloudinary api.
- Secondly, we convert the input file buffer into a readstream using the built stream library.
- Lastly, we will pipe our readstream into the cloudinary writestream.
And below is the required code to do that.
const {readable} = require("stream");
const { v2: cloudinary } = require("cloudinary");

/**
 * Upload our file to cloudinary
 * @param {buffer} buffer - file buffer
 * @return {Promise}
 */
const bufferUpload = async (buffer) => {
  return new Promise((resolve, reject) => {
    // create a write stream
    const writeStream = cloudinary.uploader.upload_stream((err, result) => {
      if (err) {
        reject(err);
        return;
      }
      resolve(result);
    });
    // create a readstream
    const readStream = new Readable({
      read() {
        this.push(buffer);
        this.push(null);
      },
    });
    // readstream -> writestream
    readStream.pipe(writeStream);
  });
};
Now that our bufferUpload code is prepared, our final app.js file should look something like below.
require("dotenv").config();

const { Readable } = require("stream");

const express = require("express");
const multer = require("multer");
const { v2: cloudinary } = require("cloudinary");

const app = express();
const multerSingle = multer();

cloudinary.config({
  cloud_name: process.env.CLOUDINARY_NAME,
  api_key: process.env.CLOUDINARY_API_KEY,
  api_secret: process.env.CLOUDINARY_API_SECRET,
});

const port = process.env.PORT || 3000;

const bufferUpload = async (buffer) => {
  return new Promise((resolve, reject) => {
    const writeStream = cloudinary.uploader.upload_stream((err, result) => {
      if (err) {
        reject(err);
        return;
      }
      resolve(result);
    });
    const readStream = new Readable({
      read() {
        this.push(buffer);
        this.push(null);
      },
    });
    readStream.pipe(writeStream);
  });
};

app.post("/upload", multerSingle.single("image"), async (req, res) => {
  const { buffer } = req.file;
  try {
    const { secure_url } = await bufferUpload(buffer);
    res.status(200).send(`Successfully uploaded, url: ${secure_url}`);
  } catch (error) {
    res.send("Something went wrong please try again later..");
  }
});

app.listen(port, () => {
  console.log("Server is up and running at PORT", port);
});
Test our nodejs application
Now that we have all the required code ready, we can proceed to the rest API. Before that please make sure we have postman installed on your system.
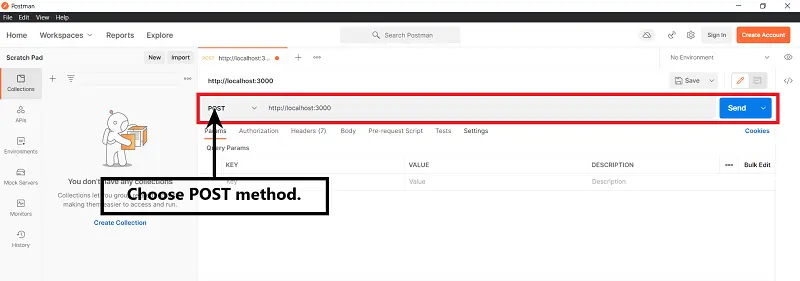
Test with Postman
Firstly, we need to select POST as our request method and put in the URL of our local server, in our case it is on the localhost and port 3000 so the URL will be http://localhost:3000.
Secondly, under the body tab, we need to select form-data as our body type.
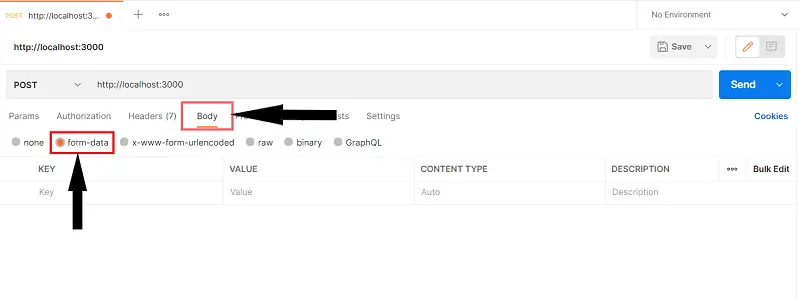
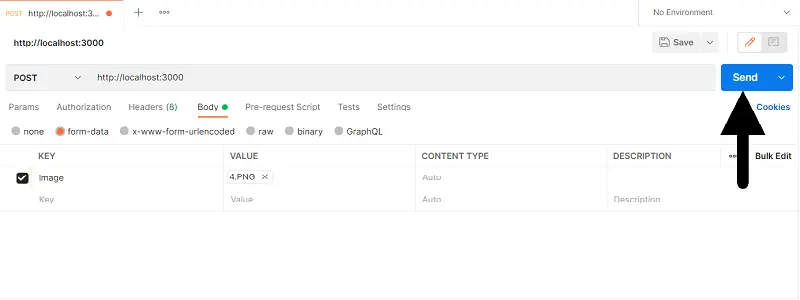
Thirdly, under keys, we need to put in “image” and select the type as a file from the dropdown. In addition to that, under the value column, we will need to choose the required image that we want to upload.
Last but not the least, we will need to send a request by clicking on the send button to the right as shown in the image below.
In case our request went through and was successful, we should expect something similar to the below.

Create an index.html file and test image upload using a browser
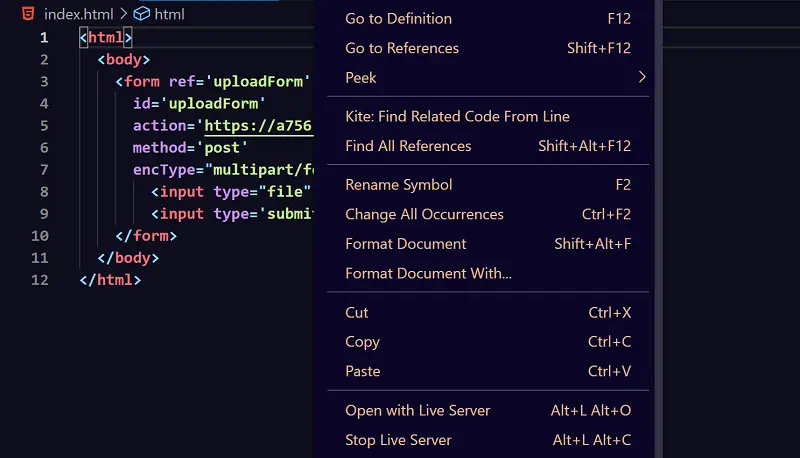
Apart from the postman method, we can also test our application using a browser. For that, we need to create an index.html file with a basic form.
Create a basic index.html file and paste in the code below.
<!DOCTYPE html>
<html lang="en">
  <head>
    <meta charset="UTF-8" />
    <meta http-equiv="X-UA-Compatible" content="IE=edge" />
    <meta name="viewport" content="width=device-width, initial-scale=1.0" />
    <title>upload image</title>
  </head>
  <!--do note the enctype-->
  <body>
    <form
      action="http://localhost:3000/upload"
      method="post"
      enctype="multipart/form-data">
      <input type="file" name="image" />
      <input type="submit" value="Upload" />
    </form>
  </body>
</html>
Now please note that opening index.html in your browser using the file protocol won’t work. To solve this issue, we can use an extension in visual studio code known as live server. You can also use other solutions too as per your liking like Xampp, Winamp etc.
Once our index.html file is live we can navigate to our browser and open it. Then we Choose a file we want to upload and click on the upload button to upload our file.

In case our request went through and was successful, we should expect something similar to the below.

Conclusion
Walah! we have successfully uploaded our image to Cloudinary using our nodejs application. I hope this post might have helped you a little bit to create similar projects. In case of any doubt, please feel free to ask in the comment section or leave you can precious feedback too.
THANK YOU!